Total Items: 0
Sub Total: $0.00

Looking to escape the crowds and dive into a winter wonderland this season?
Recently, Freya from our Brisbane store, and her whole family, traded in their skis and snowboards for 5 pairs of snowshoes and backpacks, and experienced unforgettable family moments in Australia's Snowy Mountains. Snowshoeing offers the perfect way to explore winter trails and immerse yourself in pristine snowy landscapes. With just a bit of preparation, appropriate gear, and reasonable fitness, it's an adventure accessible to everyone. Here’s the story of our journey, complete with insights and tips to inspire your own snowy escape!
.jpg)
What's a Snowshoe? The Origins of Snowshoeing
Snowshoeing traces back over 6,000 years, originally developed by Indigenous peoples of North America and Eurasia for travelling and hunting in deep snow. Early designs crafted from wood and animal hides have evolved into today's lightweight, technical snowshoes. While popular in snowy destinations like Canada, Norway, and Japan, snowshoeing remains a hidden gem in Australia—yet it's an extraordinary way to experience our alpine environments transformed into magical icy playgrounds.
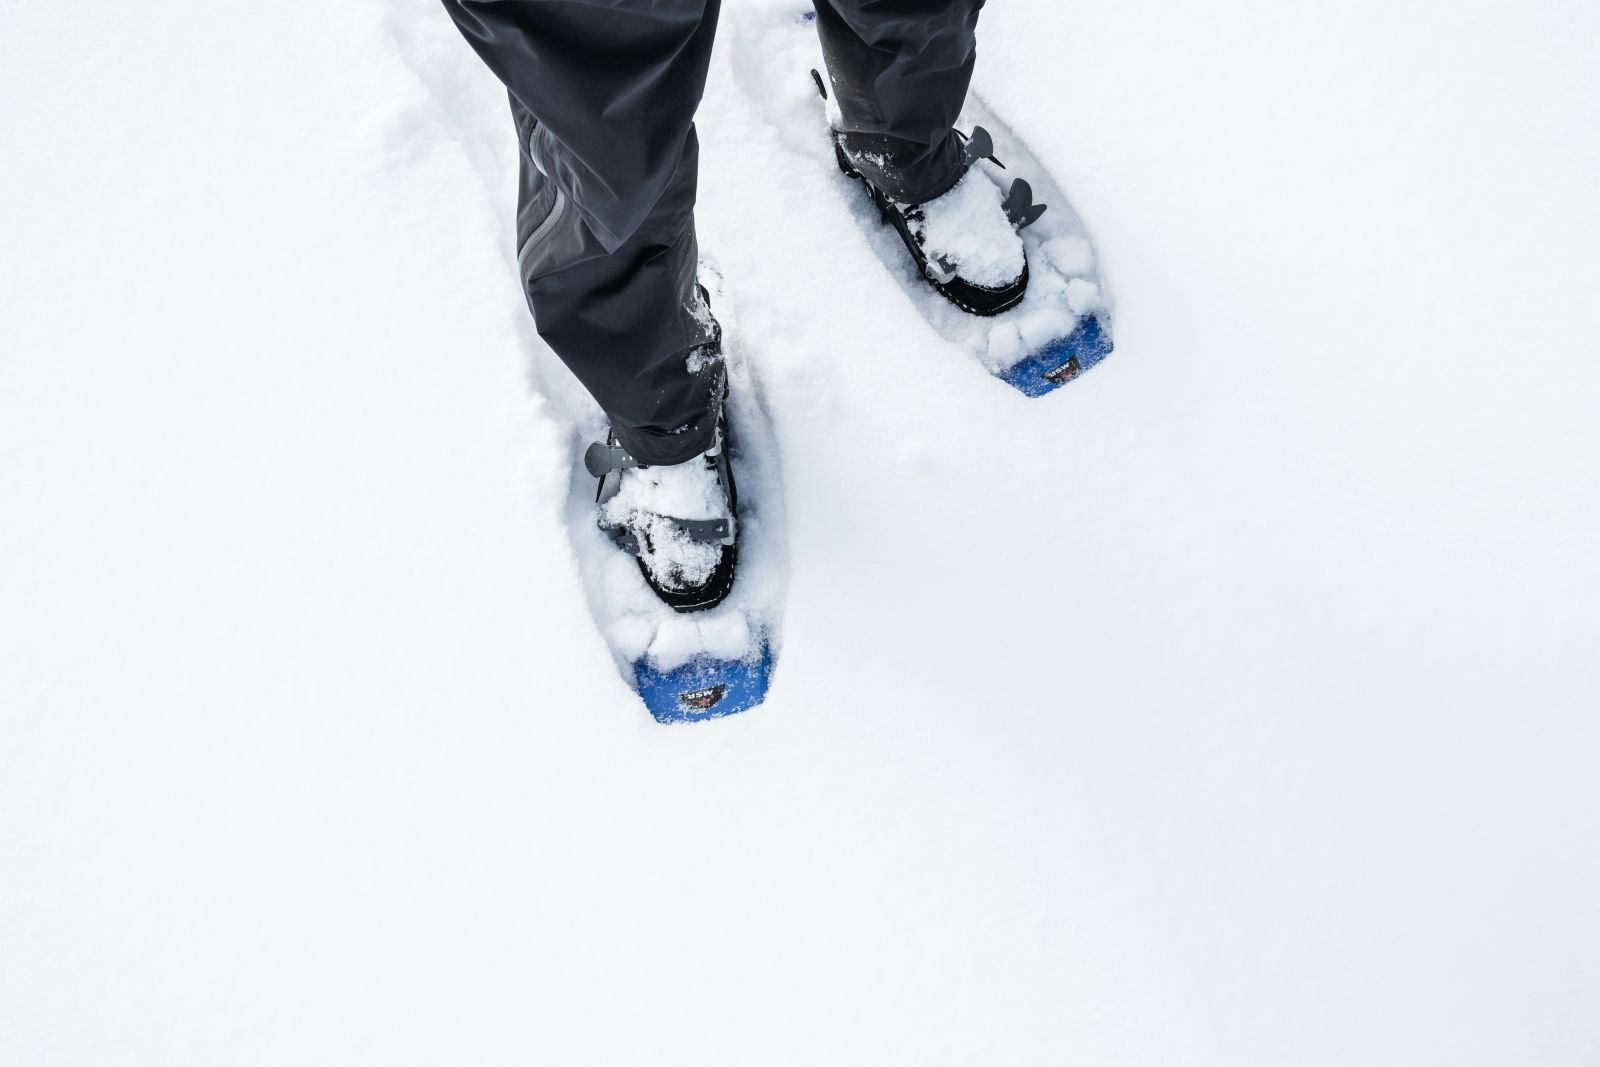
Today's Snowshoes Explained
Modern snowshoes consist of four main components:
Planning the Adventure: The Essentials for Winter in the Snowy Mountains
Australia's snow season typically runs from June to August—though it can be unpredictable! We suggest planning your adventure from late June onwards to enjoy maximum snow coverage. Be ready for fresh, deep powder—at times, we found ourselves sinking thigh-deep into snowbanks, making every step an adventure!
The Australian Alps are famous for quickly changing conditions, from sunny skies to sudden snowstorms and wind gusts exceeding 100km/h. Proper preparation and skills are essential for safe and enjoyable snowshoeing and camping. Don’t underestimate the alpine environment—it can make the difference between creating wonderful memories or experiencing unexpected mishaps.
"Australia has a notoriously unpredictable alpine environment! One minute the sun is shining and the next minute the weather has closed in and you are in a complete white out!”
Essential Skills & Knowledge
If you’re new to snowshoeing, it’s vital to get skilled up! Navigation, survival techniques, and first aid skills specific to alpine conditions are crucial. We teamed up with K7 Adventures and their expert guide, Mike Edmondson, to enhance our snowcraft and navigation skills. An added bonus—Mike is an award-winning landscape photographer who shared fantastic tips on capturing stunning alpine images!
Must-Have Safety Gear
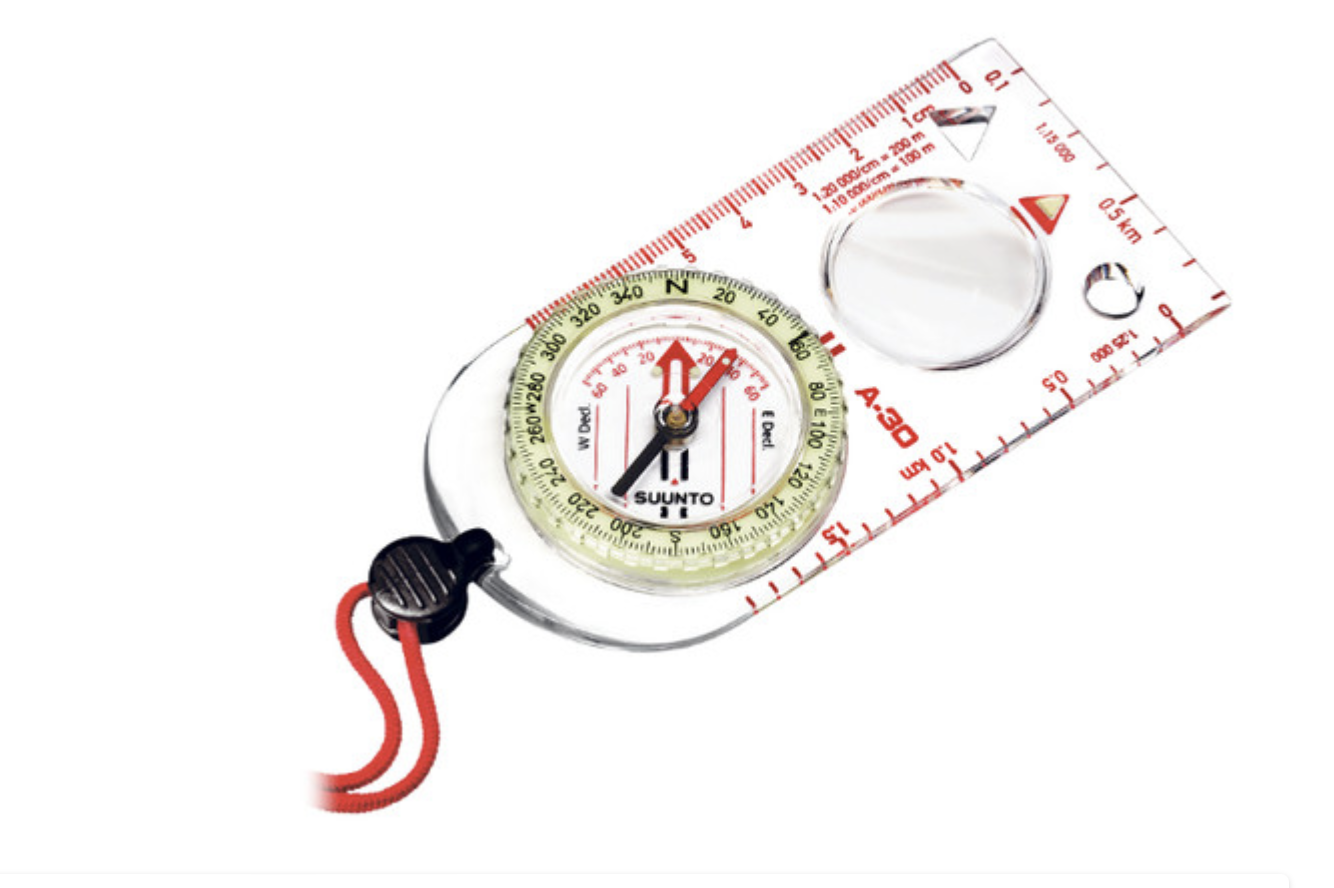 Topographical Map & Compass
First Aid & Survival Kits
EPIRB or Satellite Phone
Permits & Regulations
Kosciuszko National Park requires passes for entry—options range from single-day to annual permits. These can be easily purchased at park entry points or online. The type of pass that’s right for you will depend on; how long you plan to stay in Kosciuszko, if you plan to make multiple visits a year, if you’ll also be visiting any of the other areas. More information can be found here.
NB. We obtained our permit at one of the drive-through stations on your way into the park!
Handling Waste Responsibly (AKA how to pee and poop in the woods)
In the backcountry, it's critical (and mandatory!) to carry out all waste. Pack an old plastic container, biodegradable oven paper, and small plastic bags. Ensure everything returns with you—never bury waste in the snow!
Our Journey Through the Snow
When planning an expedition, no matter how big or small, one thing you can’t be sure of is the weather. Especially if you are bound by a set of dates and booked plane flights, accommodation, etc. expect the unexpected! While meeting with our guide for a pre-trip briefing and assessing the trip, the weather was looking like it was going to be spicy! Snowstorms and high winds saw us having to change the original itinerary and adapt our plans to the conditions. We had planned to summit out on Mt Kosciuszko on Day 2, but due to white-out conditions and 75-95km winds at the summit, we altered our itinerary
Day 1: 4-5 Hours on the Trail, 7 km
.jpg)
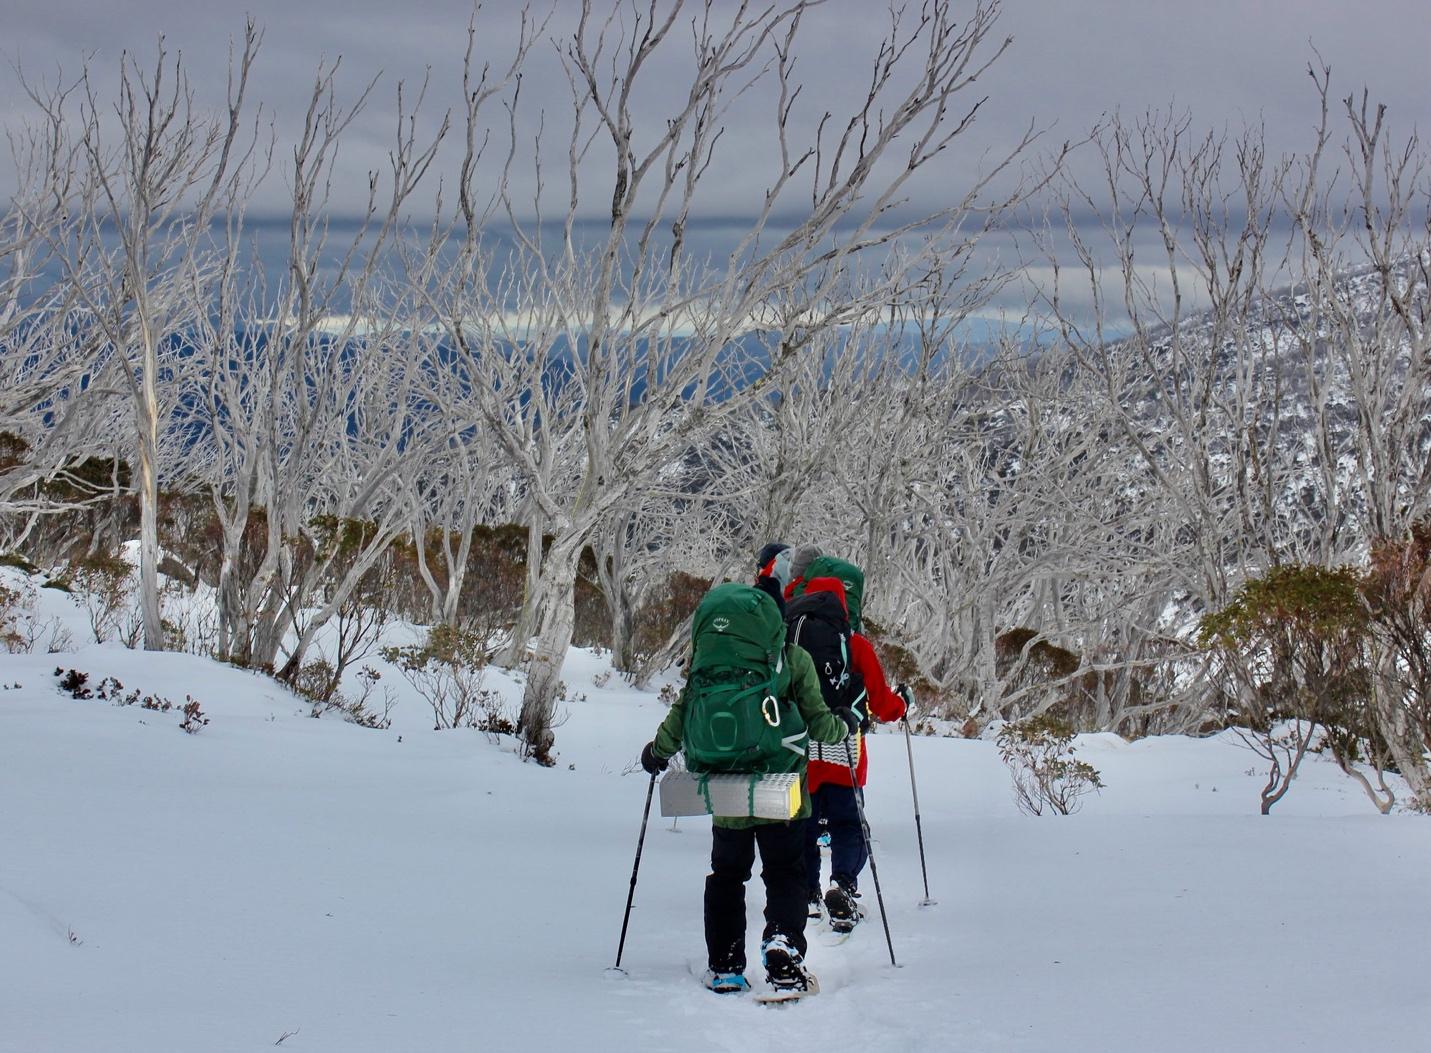
At 8:00 am, we left Dead Horse Gap carpark and began our journey, heading towards our base camp under South Rams Head, nestled in the protection of the snow gum forest. The trail was mainly uphill, a solid climb made more challenging by our large packs. As we ascended, the wind picked up, sending flurries of snowflakes stinging against our cheeks. The snowy landscape around us was both breathtaking and formidable, with the wildness of the mountains reminding us of our vulnerability in such conditions. Our Gore-Tex gear was a godsend as the wind hurled snow and ice from every direction.
By 12:30 pm, we stopped for lunch, taking a moment to refuel and enjoy the serene yet powerful beauty of the snow-covered landscape, as snowflakes whirled in flurry around us at a sheltered part of the trail.
.jpg)
We arrived at our base camp by early afternoon, around 2:00 pm and spent the next two hours dedicated to snowcraft instruction. Grabbing the snow shovels, we learned to build platforms and snow walls for our tents and constructed tables and seats for our camp kitchen. Erecting the kitchen tent was a satisfying end to our efforts, ensuring we had a cosy spot for the coming evening meal.
From 5:00 pm to 6:00 pm, we had time to relax and take in the stunning surroundings, before finding what we would need before we lost the afternoon light and toned our head lamps. Every part of me felt alive, a reminder that stepping away from the comforts of our cities and homes reveals our place in our world much bigger and more powerful than we are.
.jpg)
Day 2: 5-6 Hours on the Trail, 8 km
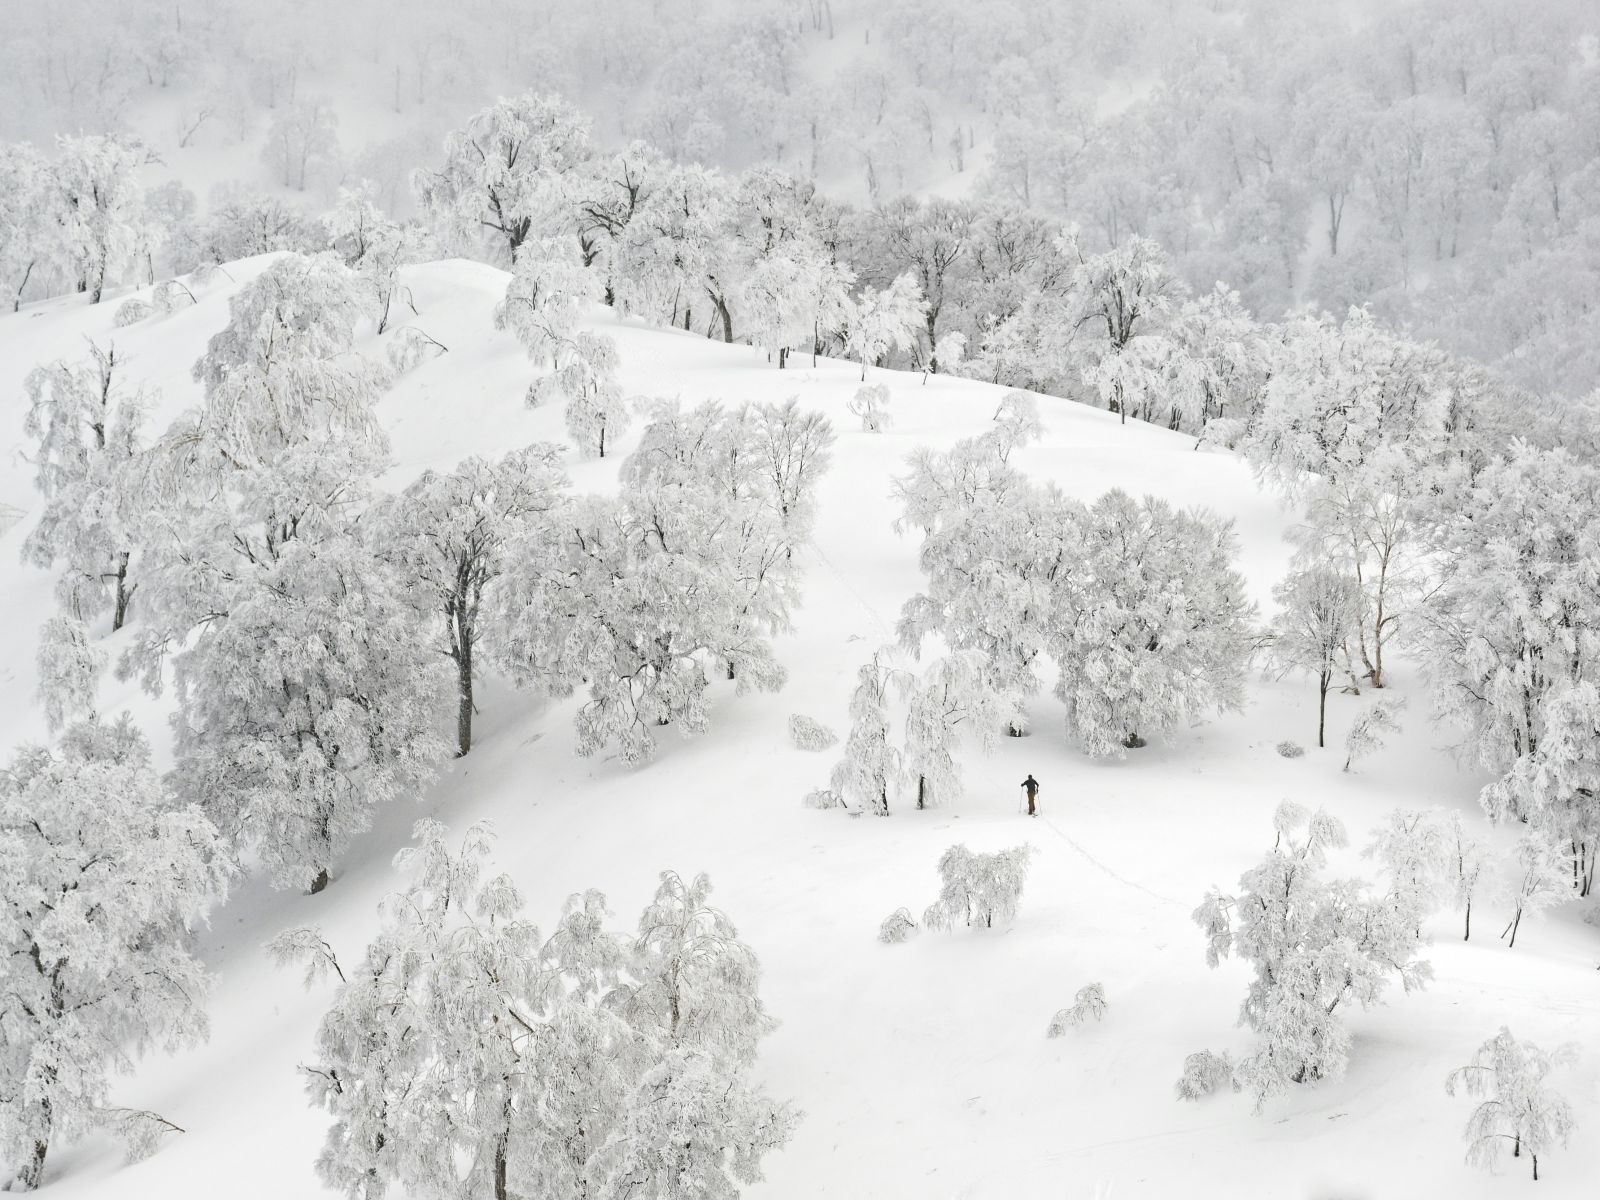
Day two began with a stunning sunrise at 7:30 am, a sight so beautiful that it made us momentarily forget the freezing temperatures as we emerged from our warm sleeping bags. Sunrise photography was a priority, with layers of clothing, hand warmers, and two pairs of gloves ready. Despite our preparations, the cold quickly took its toll, making it difficult to change camera settings after just ten minutes. By 8:30 am, we were ready to snowshoe to Aries Tor and North Rams-head. The trail, lighter without our heavy packs, led us through clusters of snow gums, their branches laden with snow under crystal blue skies. The wind whistled past our ears, and the crunch of compacting snow beneath our snowshoes created a rhythmic soundtrack. We traced each other’s steps to avoid being the first to fall thigh-high into the untouched snow.
.jpg)
Throughout the day, we paused to catch our breath and take photos, trying to capture the astounding beauty of the high country. The landscape was both breathtaking and absorbing, with every turn offering new photographic opportunities.
.jpg)
We reached North Rams-head Summit for lunch and more photography, soaking in the panoramic views. Returning to camp by mid-afternoon, we enjoyed a rest before engaging in a session of afternoon yoga on the snow, a serene and invigorating experience. As the day drew to a close, we watched the sunset and enjoyed a well-deserved dinner, reflecting on the awe-inspiring scenery and the challenges overcome. The high country had shown us its majesty and its power, leaving us in awe of the natural world.
.jpg)
Day 3: 4-5 Hours on the Trail, 7 km
After our beautiful sunrise the day before, we woke on day three to the sound of rain pattering on our tents. It almost seemed too snuggly to leave the warm sleeping bag, so we took our time to greet the day. Over breakfast, we received a briefing about an impending afternoon weather front, with wind speeds reaching 95 km per hour at the summit of Kosciuszko. Shelter would be our friend today.
.jpg)
After a leisurely breakfast and some quick photography, we decided to pack up early and hike with our big packs to an area with 400-year-old snow gums. These ancient trees are truly remarkable. Their trunks, gnarled and twisted by centuries of harsh weather, are adorned with a mosaic of colours—greys, browns, greens, and creams—creating a stark contrast against the pure white snow. The resilience of these trees in such extreme environments is awe-inspiring.
As we hiked, we savoured the last day of our journey and the beauty of the untouched landscape. We stopped for lunch along the way, and as we descended snowflakes began to once again swirl around us, tickling our noses and making us smile. Almost as if they were sending us on our way. We made our way down Dead Horse Gap, reflecting on the time we had spent in the backcountry over the last few days. It had been a wonderful mix of highs and lows. The extreme cold made every task harder, but it also made each reward all the greater. Whether it was taking a breathtaking photo with hands so frozen you could barely press the button, lighting a gas stove to melt snow for a hot cup of tea, or making it to the designated toilet area without snowshoes, sinking thigh-deep in freshly fallen snow while trying to manage multiple layers of clothing, each seemingly simple task took on a whole new challenge. The trip was a testament to the unique challenges and rewards we faced trekking through the virgin snow, uncovering the hidden gems of Kosciuszko National Park. What a wonderful journey it was!
.jpg)
Gear and supplies:
Below is a list of gear we would recommend if spending time camping and playing in the Australian Alps. We decided to hire some of our gear and invest in the rest, weighing up our budget and future needs.
DO invest in gear and apparel that you envision using on future adventures, building upon the gear you already have, and filling in holes in your gear stash!
DO invest in quality gear that will last you through many adventures to come.
DON’T invest in gear you imagine you will rarely or never use again! Be sensible! Are you really going to wear Neos Adventure Over-boots again anytime soon when you are living in Queensland?
You can most likely hire these pieces locally in the Snowies region. (Unless you have an unlimited budget and cost is not even a consideration…in that case, go for your life!
NB. There are some great companies in Jindabyne where you can rent gear or you can hire directly from guides such as Mike Edmondson. Let Google be your friend, and you are sure to fins what you need!
Clothing/ Apparel
The proper clothing is absolutely crucial when out in an alpine environment. It helps protect against hypothermia, ensuring you stay warm and dry. Layering is essential to manage body temperature, while waterproof and windproof outer layers shield against the elements. Investing in high-quality, suitable attire can mean the difference between an enjoyable adventure and a dangerous ordeal, making it a vital part of trip preparation.
Why it's important: Essential for staying dry and warm in wet and snowy conditions, a waterproof jacket with a hood will protect you from precipitation and wind, ensuring you remain comfortable throughout your adventure. Trust me, it is a godsend!
Why it's important: These pants are crucial for keeping your lower body dry, especially when trekking through deep snow. They prevent moisture from seeping in, keeping you warm and comfortable. Ditto on the godsend!
Why it's important: Cold, wet hands can quickly ruin a trip. Waterproof and insulated gloves or mitts keep your hands warm and dry. Mitts are preferred as they retain heat better by allowing your fingers to share warmth. Triple ditto on the godsend!
Why it's important: These liners provide an extra layer of warmth and can be worn alone or under your waterproof gloves for added insulation. Having two pairs ensures you have a dry set ready at the end of a day playing in the snow.
Why it's important: This layer provides excellent insulation while remaining breathable, making it perfect for maintaining body heat during physical activities in cold weather.
Why it's important: These pants offer warmth and flexibility, ideal for active movement in cold conditions. They help keep your legs insulated without restricting mobility.
Why it's important: A down jacket is invaluable for providing high warmth-to-weight ratio. It's perfect for layering and keeping you warm during rest periods or in extremely cold weather.
Why it's important: Recommended by our guide, these overboots ensure your feet stay dry even in deep snow. They fit over your hiking boots, providing an additional waterproof layer up to your calves, making them essential for prolonged snow exposure.
Why it's important: Sturdy and waterproof hiking boots are essential for protecting your feet from cold and moisture. Adding sheepskin shoe liners can enhance warmth, making them even more toastie and comfortable for long hikes in snow.
Why it's important: These are lifesavers for keeping extremities warm in freezing conditions. They prevent your hands and feet from becoming painfully cold, ensuring overall comfort.
Why it's important: Thermals provide a crucial base layer that traps heat close to your body. Wool or polypro options are both effective in maintaining warmth while wicking moisture away.
Why it's important: Keeping your feet warm and dry is essential for comfort and not having frozen tootsies. Thermal socks provide the necessary insulation and moisture-wicking properties you need.
Why it's important: These accessories protect your head, neck, and face from the cold and wind, like mini doonas when the snow and ice are whipping at your face ferociously. They help retain body heat and prevent windburn in exposed areas.
Why it's important: Protecting your eyes from UV rays and glare of the snow is crucial. Sunglasses or goggles prevent snow blindness and enhance visibility in bright, snowy conditions.
Why it's important: A small, quick-dry towel is handy for wiping condensation inside your tent, drying off gear, or cleaning camera lenses, ensuring your equipment stays dry and functional.
Why it's important: In alpine regions, the sun's rays can be intense. A sun hat, sunburn cream, and lip balm protect your skin and lips from sunburn and chapping, not to mention cold sores!
Other gear essentials:
1. Nalgene Wide-Mouthed Water Bottle (Nalgenes can hold boiling water)
2. Water purification tablets or a filter to purify water before drinking
3. Down Sleeping Bag (-11 degrees Comfort Rating minimum)
4. Knife, Fork, Spoon, Plate, and Mug (durable and lightweight)
5. Head Torch and spare batteries
6. Quality Lightweight Winter Sleep Mat (with 4+ R rating)
7. Foam Mat for additional insulation
8. Winter 4 Season Tent and Snow Pegs
9. Hiking Pack
10. Snow Shovel
11. Snow/Ski Poles
12. Survival Blanket
13. Hiking Stove
Stoves in the Snow
Hiking stoves can be quite temperamental in sub-zero temperatures, and everyone seems to have their own opinion as to what type is best. Gas pressure inside canisters can drop in the cold, reducing stove efficiency because the fuel doesn't vaporise well. Additionally, cold weather makes ignition difficult, as automatic systems may fail and manual lighting is challenging with cold hands or gloves. Despite all this, gas is still a great choice as it offers the ability to cook inside your tent if the weather turns on you! Nothing is going to light outside in a snowstorm and it isn’t the most pleasant place to sit while trying to eat without getting hypothermia! We recommended using either an MSR or Jetboil stove with gas canisters rather than metho stoves. We also recommend a stove windshield and base to keep the temperature of the gas canister higher and off the snow.
Our last recommendation here is to carry a gas lighter in your gear. We used Jetboil Minimos, and even though they have an automatic lighting system, in the off chance it doesn’t ignite, a lighter will save the day. (NB. Get a lighter large enough to handle even while wearing 2 pairs of gloves!!!!)
Lastly, we used 230g gas cylinders. We took spares, but one should last 2 people 3 days in winter & 4 days in summer.
NB. A quick note for plane travel, no you can’t pack a gas canister anywhere in your luggage. Prepare to buy these when you reach the Snowy’s region.
Food
A major consideration of a multi-day hike is the kind of food you’ll need for your journey. Food needs to be nutrient-rich (and provide enough kilojoules for each day), space-saving and as light as possible! Preplanning was the best way to ensure we had enough food for our trip each day, as well as a little extra in the case of an emergency. Below is a list of foods we found suited our needs and tastes:
Your local supermarket is a great place to get many of the food items you need, but we also invested in specialised dehydrated meals for our dinners. These meals are often formulated to meet the energy requirements of outdoor pursuits and provide the right amount of cal/kcals of energy required for an active day outdoors. They take a mix of calories from fats, protein and carbohydrates providing a balanced meal that only requires hot water to prepare!
What are you waiting for?
So, what are you waiting for? Start planning your next family holiday to the snow! Forget the long lines waiting to get on the ski lift, and take the road less travelled. Grab the family, your pack, and some snow shoes and hit the backcountry. Why not even mix snowshoeing with some backcountry or cross-country skiing? The only limit is your imagination!
And if you want to get the lowdown on all the prep and the Snowy Mountains secret spots along the way, drop into Wild Earth Brisbane and have a chat to Freya.
Happy Snowshoeing!

Gold Coast
25 Central Dr, Burleigh Heads
Gold Coast, QLD 4220
Brisbane
Shop 2/30 The Circuit, Skygate Home & Life
Brisbane, QLD 4008
Contact Details
1800 841 847
service@wildearth.com.au

Copyright © 2014 - 2025 Wild Earth. All Rights Reserved. ABN: 67 116 973 856

Using Afterpay you can pay for your order over 8 weeks. There's no interest or added fees* and nothing to pay today. Payment will be automatically taken from your debit or credit card in four equal payments each fortnight over 8 weeks, and you will receive your order immediately.
You simply need:
To use this service simply:
Approved AfterPay buyers will require the funds for the first payment to be available on their card at time of checkout, however the first payment won't be deducted for 14 days. First time AfterPay buyers will need to make the first instalment payment at the time of their purchase.
If you wish to return your goods you can choose to receive an exchange, or the Afterpay payment plan can be cancelled before the first payment at no charge. *If you fail to have sufficient funds available for AfterPay to automatically deduct payment on due instalment dates you will be charged a late fee of $10, and if the instalment payment remains overdue, an additional $7 will be charged one week later.
With AfterPay, there's no waiting and we'll ship out your order immediately as normal.
When you want to go now, sometimes it's handy to pay later. That's why, we offer interest free payment plans from two of Australia's favourite Buy now, Pay later services.