Total Items: 0
Sub Total: $0.00
01.08.2018
.jpg)
Author- Octavia Drughi, Mountaineer
For many of us, winter is the prime time for engaging in exciting outdoor activities during the day and sipping mulled wine and hot cocoa by the fireplace during the evening. But how about stepping out of your comfort zone and doing something even more spectacular?
Whichever may be your favorite outdoor sport, be it surfing remote waves, trekking narrow ridges, picturesque coastal hikes, rock climbing or paddle boarding, you should never stop doing what you love, regardless of the season. If you’re passionate about water sports, there’s no need to travel halfway around the globe to some exotic beach crammed up with people. Winter paddle boarding is already making waves and can easily be combined with a multi-day snowshoeing or hiking and camping trip.
If you simply cannot stand the cold, then snow camping probably isn’t for you. But if you’re an outdoor lover like myself who finds all seasons just as charming and worthwhile, then don’t let the cold weather intimidate you and follow my tips and tricks to make your first winter camping adventure a success!
Essential winter camping equipment
Layer up and pack warm clothes
base layer (thermal underwear)
insulating layer (the one that’s actually keeping you warm)
outer layer, or shell (the windproof, waterproof and breathable layer that protects you from the weather).
While trekking, snowshoeing, skiing or winter paddle boarding, you might start to feel comfortable even at -15°C. But you’ll also be sweating, and you need your clothes to be able to evacuate all that perspiration effectively. Once you stop moving, you should not feel wet or cold. Pack an extra dry undershirt or two so that you can change when you stop. You should also throw on your goose down jacket each time you take a longer break.
Choose a lightweight winter hiking backpack
Winter clothing can be quite voluminous, which is precisely why you should choose an appropriate backpack for your winter hiking and camping adventure. Your backpack should be large enough to fit all your equipment without being too bulky. It should also fit your size and be lightweight. I’m 1,60 m (5’2’’) gal, and a 60-liter backpack is the maximum I can handle without putting too much strain on my body. Also, try to pack the bare minimum. Winter hiking is hard work as it is, and you wouldn’t want to be carrying too much weight.
Make sure the backpack has lash points to attach accessories like trekking poles, snow shovel, snowshoes, skis, crampons, ice axe, etc. Split the components of the tent between your trekking partners. You can attach the poles to the outside of your backpack, and you can do the same with your sleeping pad (just make sure you use a waterproof cover for it).
Winter sleeping bag
Choose a sleeping bag that is rated at least 10 °C below the minimum temperature you expect to encounter. Read the labels to see the ratings for comfort, limit and extreme.
The comfort rating refers to the lowest temperature at which you will not feel cold and will be able to sleep in a relaxed posture.
The limit refers to the temperature at which you feel cold but are not shivering yet. Your posture will most likely be curled up inside the sleeping bag, but you are not at any risk. However, this is not a very comfortable situation to be in, and if you have a strenuous trek to do the next day, you may feel tired after such a night.
The extreme rating is the lowest temperature at which the sleeping bag can protect you from frostbites. And believe me, sleeping in these conditions is out of the question – you’ll be shivering and literally fighting to stay warm.
Goose down is superior to synthetic insulation, but it is also more expensive. You must also make sure to keep your goose down sleeping bag dry, or it will not do such a good job at keeping you warm.
I can still recall a few nights when I had to use an emergency blanket inside the sleeping bag because it was simply too cold. I couldn’t get any sleep, but at least I survived the night! I learned my lesson and I now postpone my treks when temperatures below -33 °C (-27 °F) are forecasted.
Winter sleeping mat
Some may recommend using two sleeping pads one over the other for extra insulation during winter. But this can take up too much space. That’s why it’s better to get a pad that can withstand the weather on its own.
Sleeping pads are rated using an R-value indicator, which can be between 1.0 and 8.0 – the higher the value, the better the insulation. Please take note that an R-value over 5.0 usually means bulky inflatable mattresses. But if you go for closed-cell foam pads and self-inflating pads with an R-value between 4.0 and 4.9, you should be just fine.
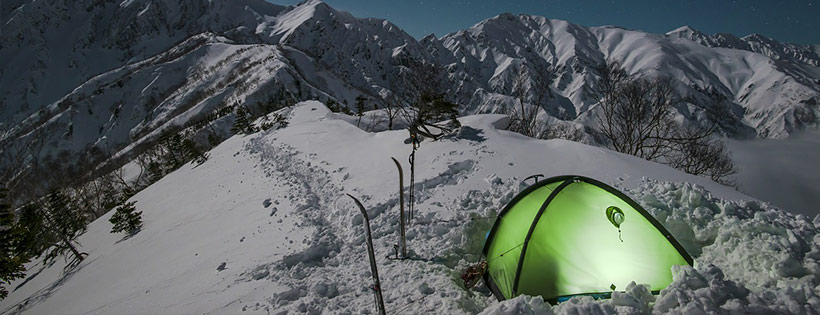
When it comes to snow camping, four-season tents are the best option. Opt for double-wall tents, which are warmer and provide better ventilation, which means less condensation. Water drops or snowflakes over your sleeping bag are not something you’d want to deal with.
Before setting up your tent, pack down the snow. Loose snow might melt over the night and result in an uncomfortable sleeping position. Also, keep in mind that it’s always better to sleep on snow than on rock or ice. Not only will it provide a more comfortable surface for sleeping, but snow is a very poor heat conductor and, therefore, a good insulator.
Canister stoves are the go-to option for three-season camping; they are lightweight, easy to use and readily accessible. Come wintertime, regular canisters may begin to struggle and act out. For this situation, there are special winter butane-propane mixes that work quite nicely regardless of the temperatures. They are a bit more expensive but certainly worthwhile.
When it comes to extreme conditions, liquid-fuel stoves can’t be beaten, as their performance does not depend on the temperatures. They run on white gas, which is readily available in most outdoor gear shops. There’s also the option of using autogas, but there’s always the risk of debris clogging the stove.
Liquid-fuel stoves may be a little trickier to operate, but they remain the best option for multi-day winter camping trips. Furthermore, they perform well in windy conditions when covered with a windscreen, whereas covering canisters can lead to overheating.
Useful winter camping tips & tricks (some of which I learned the hard way)
Sleep with your boots inside your sleeping bag
Never leave your boots in your tent vestibule! In the best-case scenario, they will be freezing cold in the morning. In the worst-case scenario, they’ll be frozen stiff. And trust me, spinning your boots over your stove like you would roast a chicken is not pleasant at all! It’s a waste of gas, time and nerves.
If your boots have removable liners, you can keep the inner boots on your feet and leave the outer boot near the sleeping bag. Otherwise, use a plastic bag to sleep with your boots inside your sleeping bag.
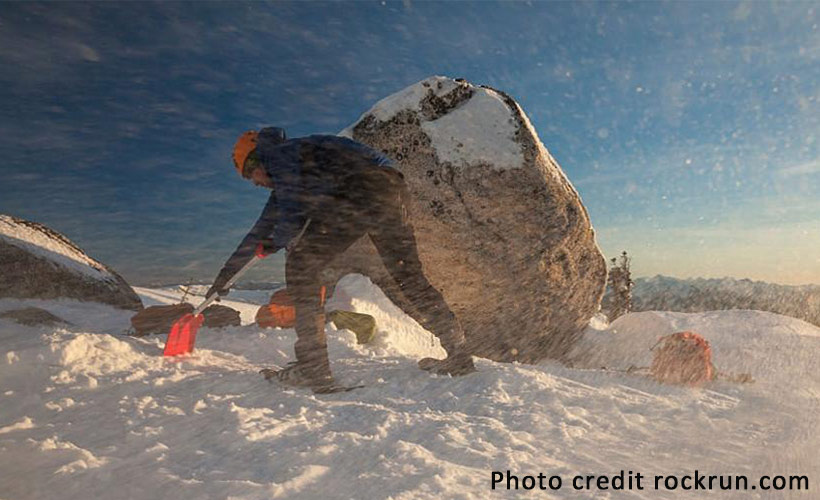
Bring a telescopic snow shovel
Leveling the surface where you wish to pitch your tent with your bare hands, trekking poles or ice axe can be daunting and can take ages. A telescopic snow shovel is lightweight and can easily be attached to your backpack. It will also come in handy when digging a snow shelter around your tent, as well as when digging for fresh water and in avalanche rescue.
Melt snow to make water
There’s no use carrying fresh water when there’s plenty of snow just outside your tent. But remember: don’t just melt the snow, boil it! Snow may seem immaculate, but it can still carry bacteria and dirt that can lead to all sorts of nasty stomach issues.
Also, keep in mind that snow is, in fact, demineralized water and does not hydrate you properly. Add some ions and nutritional value to your melted snow by squeezing a lemon inside, adding multi-vitamin powders, oral rehydration salts or throwing in some tea bags.
Opt for wide-mouth water bottles
These make pouring water you make from melting snow easier and less messy. If it’s freezing cold outside, use insulated covers for your water bottles and keep them upside down so that the lid does not freeze shut. Alternatively, wrap your wattle bottle in warm clothes inside your backpack.
Your body needs fuel to generate heat and, come night time, you should get inside your sleeping bag feeling warm. A good insulation keeps the warmth within, but you need that heat, to begin with. I tend to get very cold as soon as I stop moving. Eating a big hot meal just before I go to sleep that is rich in fats and carbs helps me stabilize my body temperature. An aspirin also helps.
Use lithium batteries
No matter where and when you set up camp, be it camping on the beach or up on the mountains, you need a sturdy headlamp that will not let you down. Of course, you also need reliable batteries. Cold temperatures drain the life out of your batteries, including your cell phone.
Lithium batteries last three times more than alkaline or Ni-MH batteries and are much more powerful in cold weather. Pack extra batteries and keep them (as well as your cell phone) warm in a pocket close to your body when you move during the day and in your sleeping bag by night.
Written by Octavia Drughi from BookSurfCamps.com.


Using Afterpay you can pay for your order over 8 weeks. There's no interest or added fees* and nothing to pay today. Payment will be automatically taken from your debit or credit card in four equal payments each fortnight over 8 weeks, and you will receive your order immediately.
You simply need:
To use this service simply:
Approved AfterPay buyers will require the funds for the first payment to be available on their card at time of checkout, however the first payment won't be deducted for 14 days. First time AfterPay buyers will need to make the first instalment payment at the time of their purchase.
If you wish to return your goods you can choose to receive an exchange, or the Afterpay payment plan can be cancelled before the first payment at no charge. *If you fail to have sufficient funds available for AfterPay to automatically deduct payment on due instalment dates you will be charged a late fee of $10, and if the instalment payment remains overdue, an additional $7 will be charged one week later.
With AfterPay, there's no waiting and we'll ship out your order immediately as normal.

When you want to go now, sometimes it's handy to pay later. That's why, we offer interest free payment plans from two of Australia's favourite Buy now, Pay later services.