Total Items: 0
Sub Total: $0.00

If you're not careful when selecting and clearing a sleeping area, rocks, thorns and twigs may end up puncturing your best chance at a good night's sleep. This is where an infield puncture kit comes in handy, and with a simple repair, you can be back sleeping in comfort.
How to patch a punctured or leaking sleeping mat
What you will need:
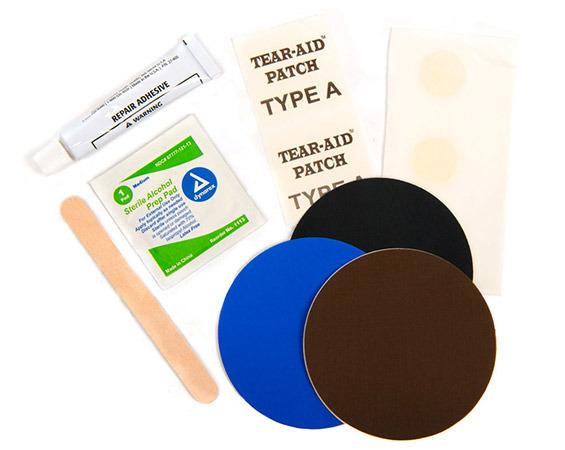
1. Identify the leak/puncture area
Step one in repairing your pad is identifying where your pad is losing pressure from; this may be a small leak or larger puncture. If you can't locate the puncture use the ‘Dunk Test’, whereby you submerge your pad in water and look for bubbles that indicate a leak. Once you have located a puncture, mark this area with a pen or tape.
2. Clean and prepare the area
Allow your sleeping pad to completely dry-out and clean the puncture site with a cleaning/alcohol wipe. Making sure the area is both clean and dry will ensure the repair patch sticks properly to the pad.
3. Peel and apply the patch over leak/puncture
With the puncture site located and prepped, it's now time to apply your patch. Select a patch from the Puncture Repair Kit, peel the backing off and place the patch (sticky-side down) over the puncture. Ensure the puncture is in the centre of the patch and the patch is large enough to cover the entirety of the tear.
4. Apply pressure (remove creases or air-bubbles)
Once you are happy with the placement of the patch apply firm pressure to the area - working outwards from the puncture. Try to remove any creases or air-bubbles that may reduce the patch’s seal. Wait for 30-minutes before re-inflating.
Now that your inflatable sleeping pad is patched you can enjoy a comfortable and warm night sleep! Gear Specialist Tip: Make sure to pack an in-field repair kit on your next over-nighter and inspect your sleeping pad before hitting the trail!


Using Afterpay you can pay for your order over 8 weeks. There's no interest or added fees* and nothing to pay today. Payment will be automatically taken from your debit or credit card in four equal payments each fortnight over 8 weeks, and you will receive your order immediately.
You simply need:
To use this service simply:
Approved AfterPay buyers will require the funds for the first payment to be available on their card at time of checkout, however the first payment won't be deducted for 14 days. First time AfterPay buyers will need to make the first instalment payment at the time of their purchase.
If you wish to return your goods you can choose to receive an exchange, or the Afterpay payment plan can be cancelled before the first payment at no charge. *If you fail to have sufficient funds available for AfterPay to automatically deduct payment on due instalment dates you will be charged a late fee of $10, and if the instalment payment remains overdue, an additional $7 will be charged one week later.
With AfterPay, there's no waiting and we'll ship out your order immediately as normal.

When you want to go now, sometimes it's handy to pay later. That's why, we offer interest free payment plans from two of Australia's favourite Buy now, Pay later services.